

This post basically adheres different steps used to translate WordPress theme and kicks off with the detailed and complete process of installation and a demo of the running of your theme in the local language.
With the incredibly astonishing evolution of WordPress over the past decade, and among multiple features that inspired us with their work efficiency, one is translation-ready WordPress themes. This feature may not appeal US residents but it has its many benefactors as according to the 2012 WordPress Survey, two-thirds of WordPress users live outside the US who might try to approach you from some other local language.
Our WordPress themes are always great to translate into your language. I am going to explain how you can easily translate your WordPress theme into your local language.
Why should you use PoEdit?
Yes, the question that you just came across is definitely valid. While you can find many WordPress plugins which can help you to translate your theme into your language. Why give priority to PoEdit instead of any other WordPress localization plugin? Actually, when you use WordPress plugins they do not support the UTF-8 characters. For example, some texts include special HTML characters like $lt; > and much more. So when you are not using a translator which supports UTF-8 they can mess up the feel and look or your website’s design and layout as well.
Not only this but it has really powerful software and you need not buy the license as it comes with free basic use (as far as advanced features are a concern you won’t really need them). That’s why we recommend you to use PoEdit to translate your WordPress theme into your local language. So, let’s start with translating our WordPress theme.
- Example Language English to Spanish
- Example theme used Veterinary Care WordPress theme
NOTE: The same procedure is accurate for all our WordPress themes and also for any other WordPress theme which is translation ready and provides translatable WordPress files.
Download and Install PoEdit
Please go to PoEdit. Download and install the software on your computer. Once you have installed the PoEdit, open it. Please see the image below how it will look when you open it.

Find the translation file of your theme
Let’s assume your theme’s file is abcxyz. Most themes include translateable file in /themename/languages/ << in directory languages/ you can find <yourthemename>.pot the .pot file is an actually translatable file. If your theme does not include <themename>.pot kindly contact the author and ask him for that.
Now you have found your translatable file .pot like in the image below. Where we have shown translation file for a veterinary WordPress theme.
![]()
Starting WordPress theme’s Translation
Please open PoEdit and click on File in the top left. There you will find option New from POT/PO File. Please select that option to see image below for reference.
![]()
A dialogue box will appear for selecting a file. Now enter theme’s location languages/ directory and select theme’s .pot file. And click open like in the image below. Once you click open follow next step.
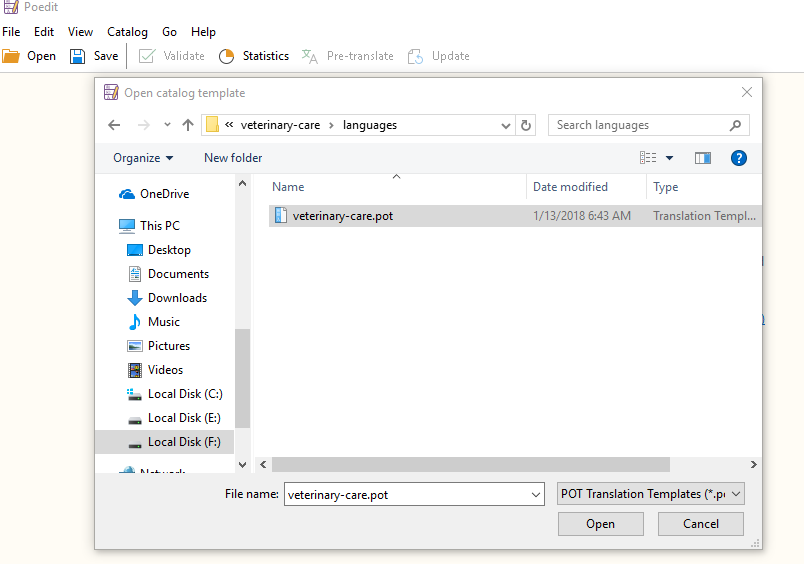
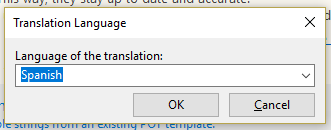
A dialogue box will appear asking you for the language you want to translate the theme into. Select your language for which you are going to translate your theme. I have selected Spanish as my translation language for this theme.
Now you are ready to translate your Theme. So let’s encounter some basics. PoEdit window contains 4 parts. The first column contains 3 rows. The 1st row includes all translation strings in different rows. You can select any string to translate. Once you select a string below in 2nd Row you see source text: This is your theme’s original words which cannot be changed. Below that box, you can find a 3rd box which has heading translation which is where the source text will be translated into your language. The fourth box and the 2nd column of the window actually have suggestions for translation.

Now you can translate each string one by one and please ignore the strings you think does not need to be translated. They will remain same. Once you have translated all your required strings click save or CTRL+S. A dialogue will appear to ask you where you want to save the translated file. Use the same directory where theme’s translatable file .pot exists.
Finishing WordPress Theme Translation and Updating Translation
PoEdit will save 2 files 1) .po, which you can open any time later to change translation or to translate other strings 2) .mo file, this is actually the file which will be working with your theme in your local language. Every time you edit .po file and save the .mo file would be updated.
![]()
Remember <themename>.pot will remain same and untouched so anytime in future using the .pot file you can make more translations of your WordPress theme.
If in future the theme’s author update or release a new version of the .pot file (that means your translation is outdated) in that case you would need to create new .po and .mo file. Until that you can always create new translations and open existing translations .po file and make changes in your translation.
Running your Theme into local Language
Now you are ready to make your WordPress website live in your local language. Just go to wp-admin >> Settings >> Find Site language and select the language you made the translation for. And save. TADA!!! your WordPress website is working in your local language.
Many congratulations on this.
Good luck! For further elaboration on the topic, please watch the video below which explains you even better on how to translate the WordPress theme into your local language
