
In today’s fast-paced world, customers expect transparency, speed, and convenience — even from local repair shops. If you’re still handling jobs with spreadsheets, sticky notes, or WhatsApp chats, it’s time to upgrade.
With RepairBuddy, the ultimate WordPress repair shop plugin, you can manage repair jobs online like a pro — tracking every device, technician, estimate, and update from one dashboard.
In this guide, you’ll learn how to:
- Set up an end-to-end repair job system on WordPress
- Organize repairs by status, customer, or technician
- Allow customers to check status online
- Automate notifications, invoices, and approvals
🔧 Why Manage Repair Jobs Online?
Let’s be honest. Manual repair job management can lead to:
- Missed updates or delays
- Confused customers
- Lost revenue
- Burnout from endless follow-ups
An online repair job system solves all that by:
- Centralizing all job data
- Creating a smooth workflow for your staff
- Giving customers peace of mind with online access
🚀 Step-by-Step: Managing Repair Jobs with RepairBuddy
✅ Step 1: Add a New Job from Frontend or Backend

Admins and technicians can easily create a new job using the backend. Customers can also book a repair online through your site.
Details captured:
- Customer info (name, phone, email)
- Device or item details
- Issues/complaints
- Drop-off or pickup preferences
- Images or attachments (optional)
✅ Step 2: Assign Technicians or Staff
RepairBuddy lets you assign jobs to users with the Technician role. Each technician sees only their own jobs, ensuring:
- Accountability
- Privacy
- Task focus
Admins can reassign or monitor all jobs from the dashboard.
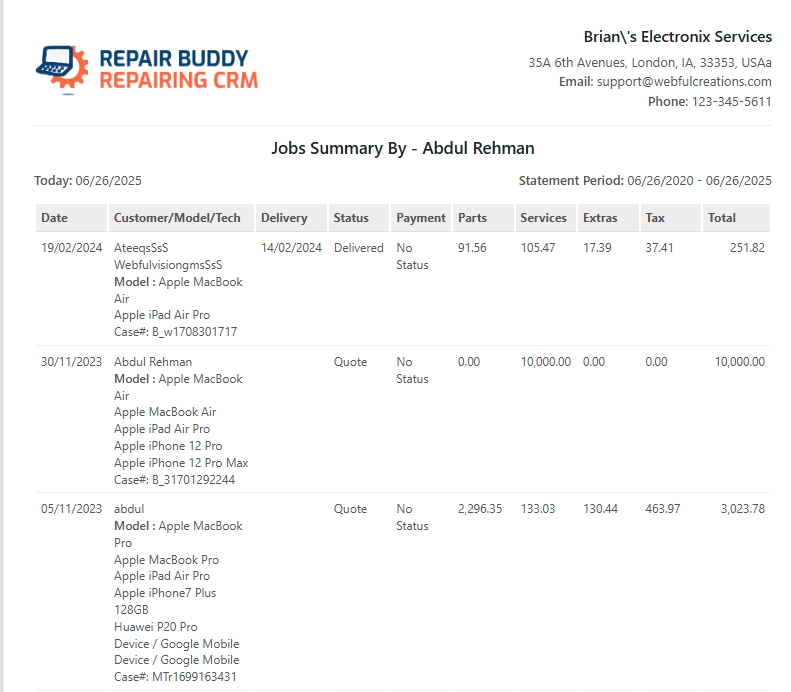
✅ Step 3: Update Job Status & Notes
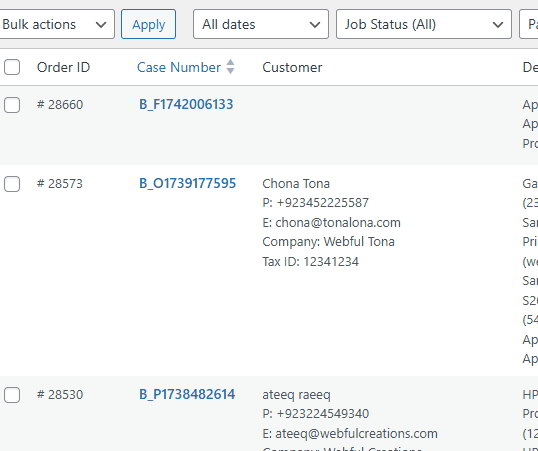
RepairBuddy supports custom job statuses like:
- Received
- Diagnosing
- Awaiting Parts
- Repair in Progress
- Ready for Pickup
- Completed
Each time you update the status, you can add internal notes, attach files, or notify the customer.
✅ Step 4: Send Estimate and Get Approval
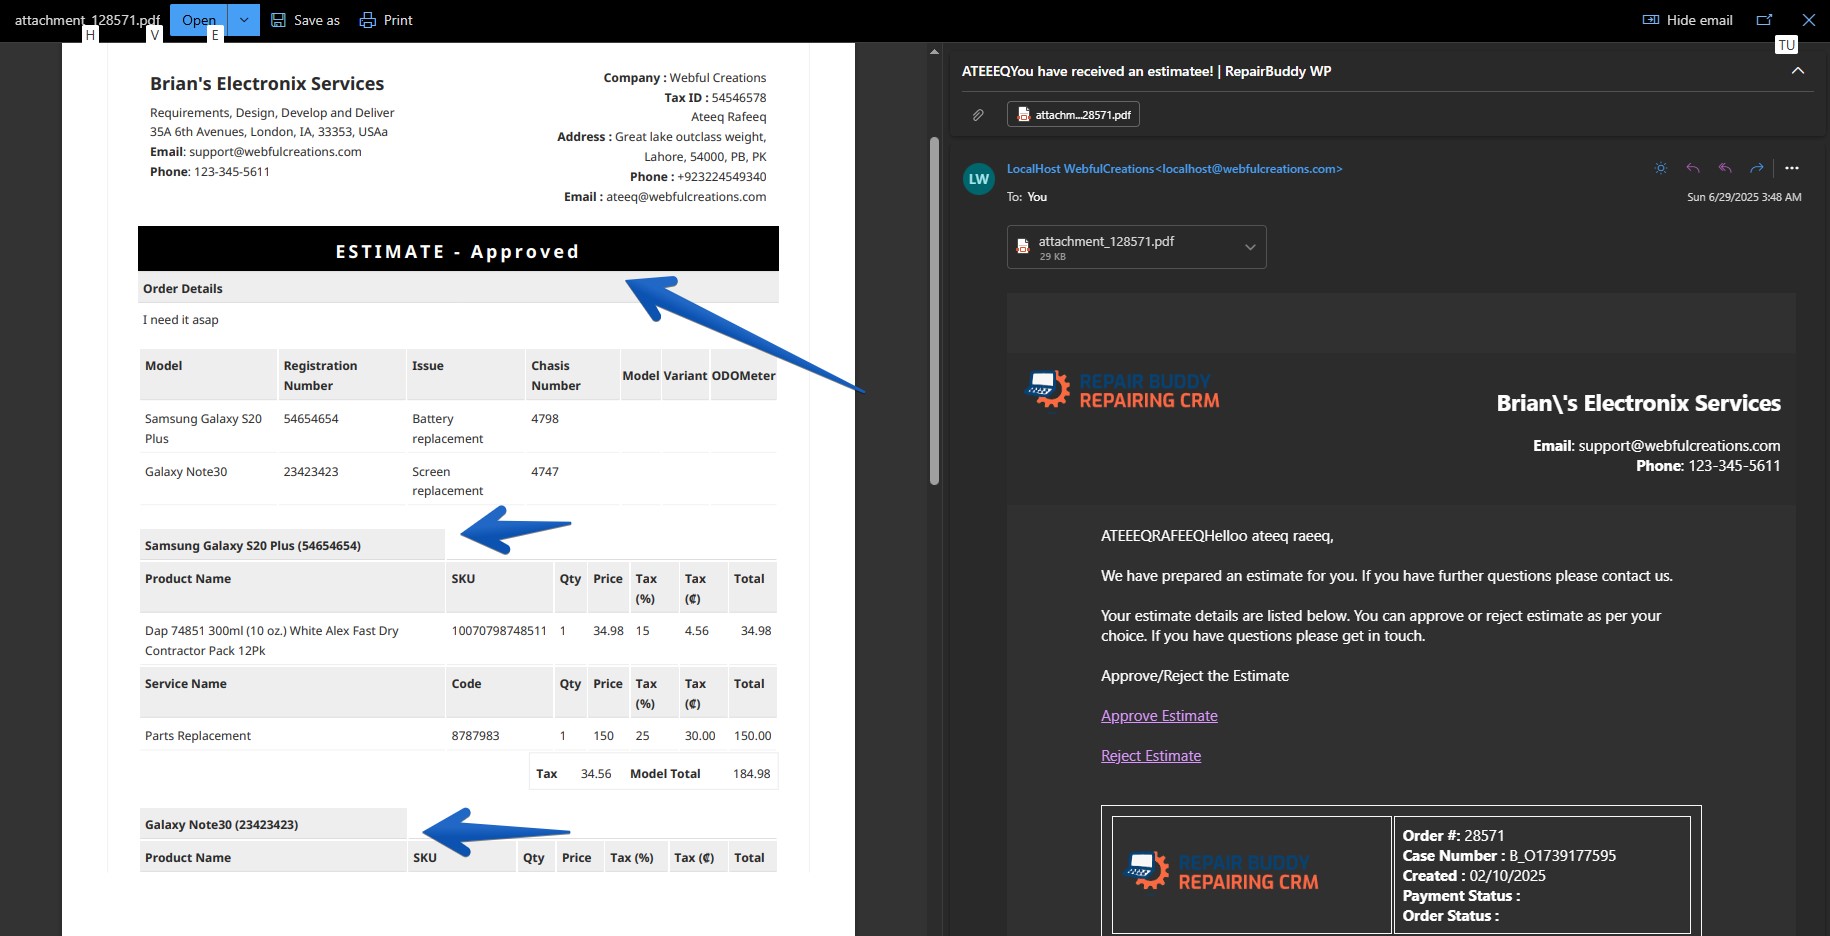
If you need customer approval before starting:
- Create an estimate (add parts/labor)
- Send it via email (auto-generated)
- Customer reviews and approves online
You can convert the estimate directly into an invoice with one click.
✅ Step 5: Notify Customer with Progress or Completion

No more endless calls. Use:
- Email notifications
- SMS (optional integration)
- WhatsApp message links
Trigger messages when:
- Job is received
- Estimate is ready
- Job is completed
- Job is delayed
Templates can be fully customized in settings.
✅ Step 6: Customer Checks Job Status Online

RepairBuddy creates a branded job tracking page where customers can:
- Enter their job ID or log in
- View live job status and updates
- Download invoices or receipts
- Submit reviews or feedback
This increases trust and reduces your support burden.
✅ Step 7: Invoice and Get Paid
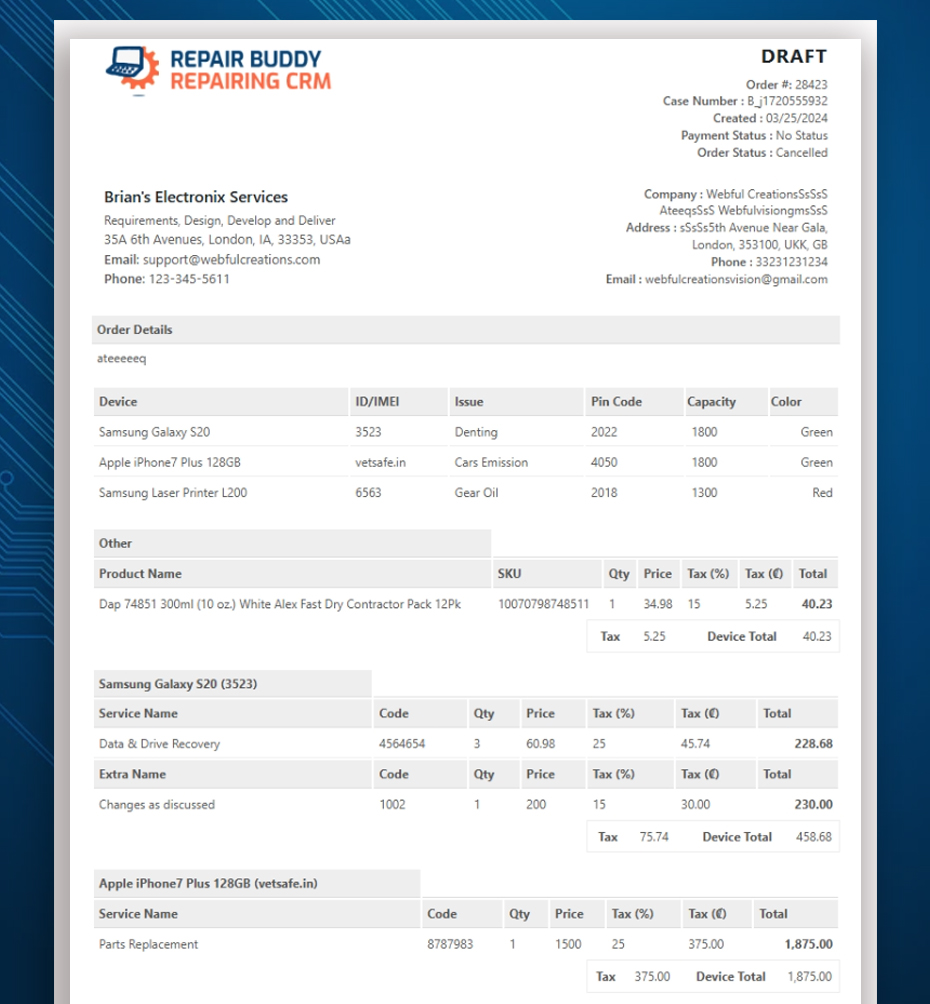
Once a job is done:
- Generate a branded invoice
- Accept online payment (via WooCommerce integration)
- Mark the job as complete
You can even link payments to a specific job for bookkeeping.
🔐 Bonus: Staff Permissions & Access Control
RepairBuddy gives you full control over:
- Admins
- Managers
- Technicians
- Customers
Each user type sees only what’s relevant — no data leaks or confusion.
🎯 Why Use RepairBuddy to Manage Repair Jobs?
✅ Built for repair shops
✅ Runs on your existing WordPress site
✅ No monthly SaaS fees
✅ Customizable to your workflow
✅ Supports multiple industries (phones, computers, watches, etc.)
Whether you’re a solo tech or managing a full repair team, RepairBuddy brings everything under one dashboard.
🧠 Final Thoughts
Managing repair jobs online shouldn’t require expensive software or complicated tools. With RepairBuddy, your WordPress website becomes a powerful repair management system — saving you time, impressing your customers, and keeping everything organized.
👉 Ready to streamline your workflow? Get RepairBuddy today and take control of your repair shop online.