Eye Care - Optometrist, Ophthalmologist, Eye Clinic, Eye Hospital WordPress Theme
Responsive EyeCare WordPress Template
- created: 28/01/2017
- latest update: 28/05/2019
- by: Ateeq Rafeeq
- company: Webful Creations Vision
- email: ateeq@webfulcreations.com
We would like to thank you for purchasing our theme! We are always around to help you please post your message to product comments. Or send us message from our ThemeForest Profile.
Installing Wordpress
First of All install wordpress If you dont know how to install wordpress follow this link.
Installing Theme
You have received theme in 1 forms in your download package, 1) Theme Files, named eyecare.zip
- Upload it via FTP(safer)
- In your download package locate folder eyecare Theme Folder Extract Theme from Zip to upload via FTP
- This main theme folder should include files like, index.php, 404.php , archive.php, screenshot.png, style.css you can check to make sure correct theme folder.
- upload whole eyecare folder to /wp-content/themes/ in your WordPress installation
- login to admin panel in WordPress, and go to Appearance->Themes and click Activate below EyeCare theme
- Upload it via admin panel(can get error while upload on slower connections)
- In your download package please locate the file eyecare.zip(theme file)
- Go to Appearance->Themes->Install Themes(Tab)->Upload and choose file eyecare.zip
- Go to Appearance->Themes and click "Activate" below EyeCare theme Please
Installing Plugins
After activating theme you wll notice a notificaton bar asking you to install required and recommended plugins, Page Builder: King composer, WebfulCreations Utilities, Contact Form 7 and WooCommerce.
Click Begin Installing Plugins, install all plugins and activate them so theme can have its all features in it.

After Installation
Now you are seeing all theme sectinos like, Teachers, courses, events, Testimonials, Products, Rev slider, Now its time to do some basic settings.
Setting Permalinks
Sign in Wordpress Admin Go to Settings >> Permalinks And set permalinks post-name for search engine Friendly URl's

Add Services, Doctors to Menu Page
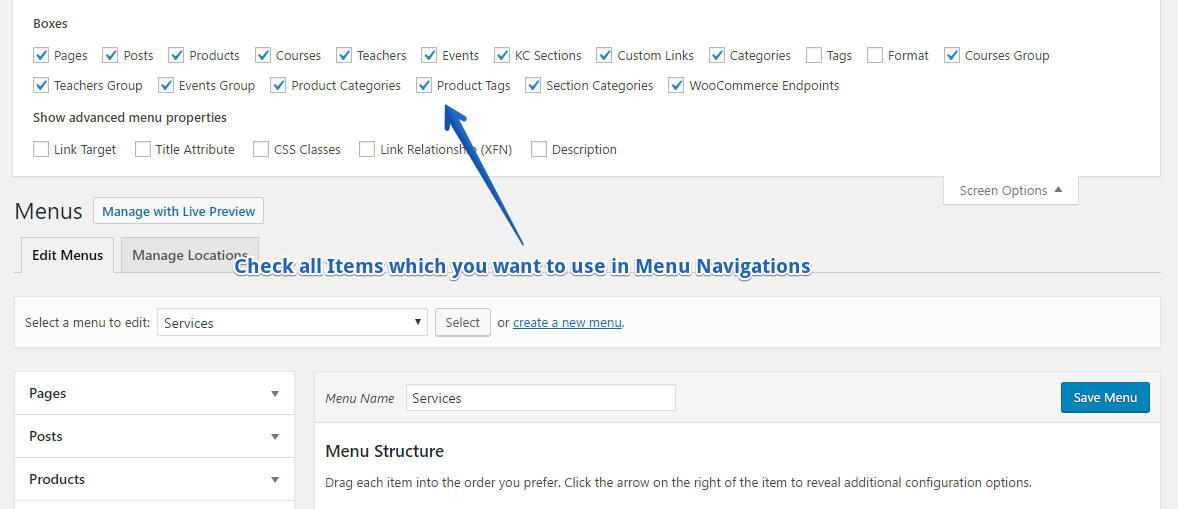
After Installing Wordpress, Theme, and Required Plugins Go to Appearance >> Menu Click on Screen Options on top right. And make checkbox to post types you want to use in Menu items.
Please visit >> Appearance >> Customize for most of site settings.
Demo Installation
Before installing demo make sure , Theme and all recommended plugins are installed and activated. Please follow steps below to install demo data exact like our demo site.
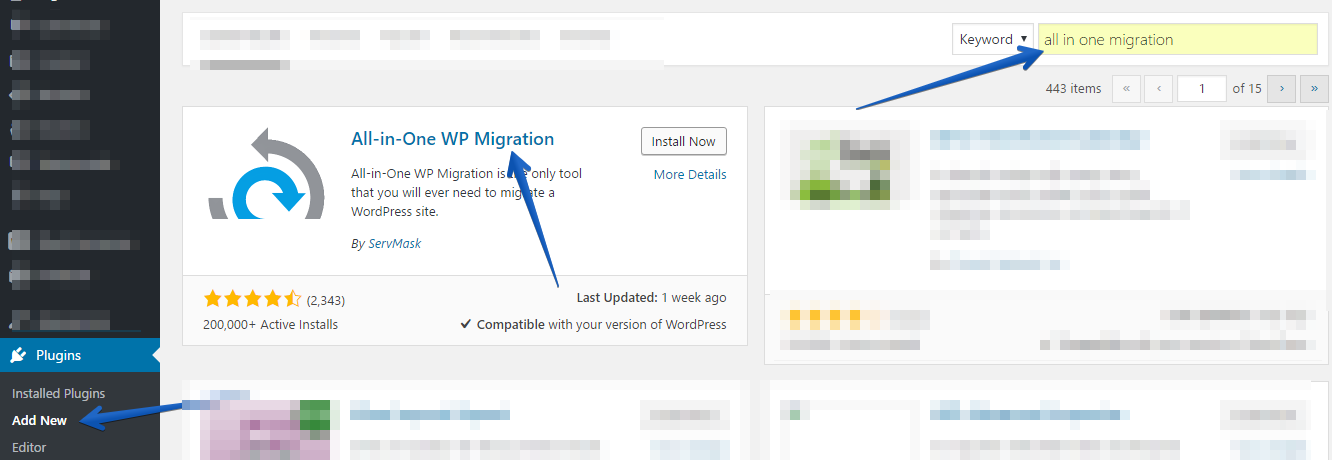
Install All-in-One WP Migration Plugin
Go to wp-admin/ Plugins >> Add New, on Search Field write, All in one migration. Now install that plugin. And activate to direct download click here.
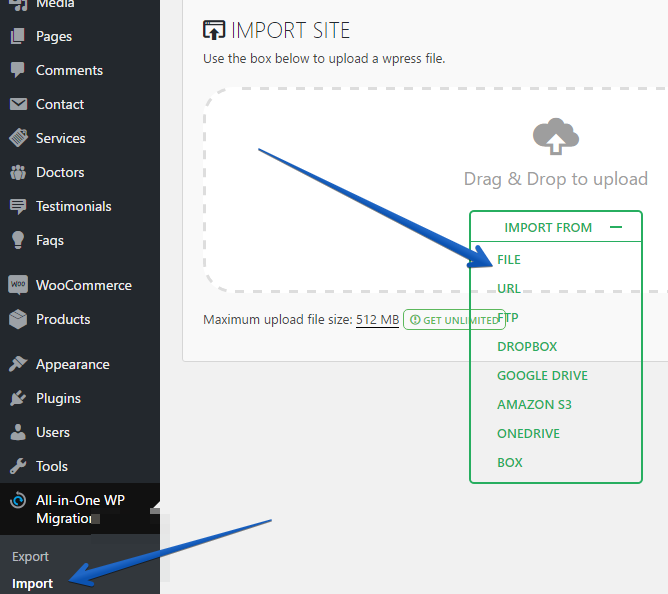
Once plugin is active, Go to wp-admin / All in one wp migration >> Import, On Button Import From Select File. Locate demo.wpress in demo folder of your download package. Click continue to Notification appear.
Logins For Demo
Once you followed above steps now you need logins of demo site to login. The logins are
Username: administrator
Password: webful!234@@dS
After Demo Setup
Please change your admin password Asap. Dont use this password as its public password.
Go to Settings >> General Change Email address.
Go to Users Edit your profile and change your name, and email as well.
That's it!
Setup Home Page
Setup home page is basically guidence how to use Elements and other features of theme so you can setup all pages easily.
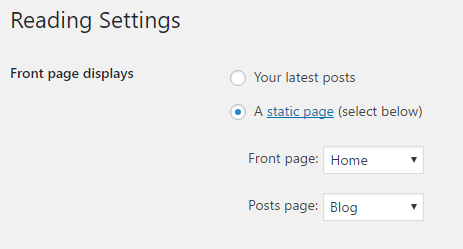
Create 2 new pages let's name them, 1) Home 2) News/Blog
Go to Settings >> Reading Front page Display A static Page and select pages.
Now edit Pages >> Home and in Templates on sidebar, select modules.
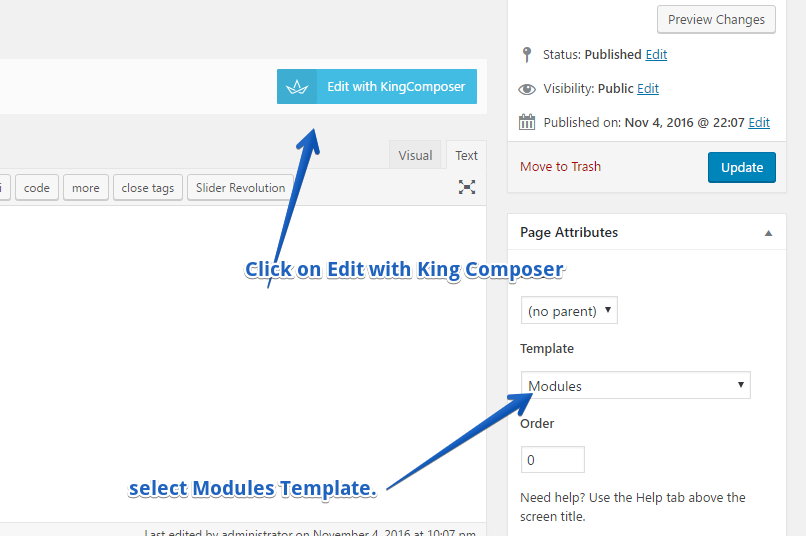
Turn off Title Section Scroll Down and you will see options Page Layout/Style. Display title section turn it off.
Add Revolution Slider
Add new Row of 1 Column. Click on Add element in Wordpress Tab Click Revolution Slider, and select the slider you want to display.
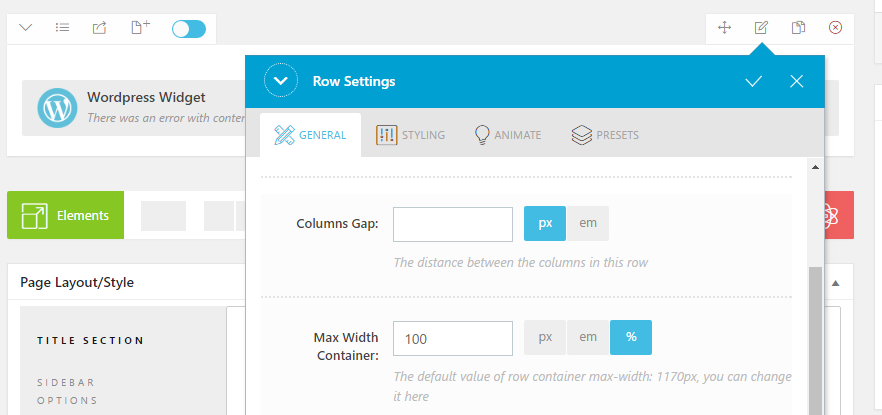
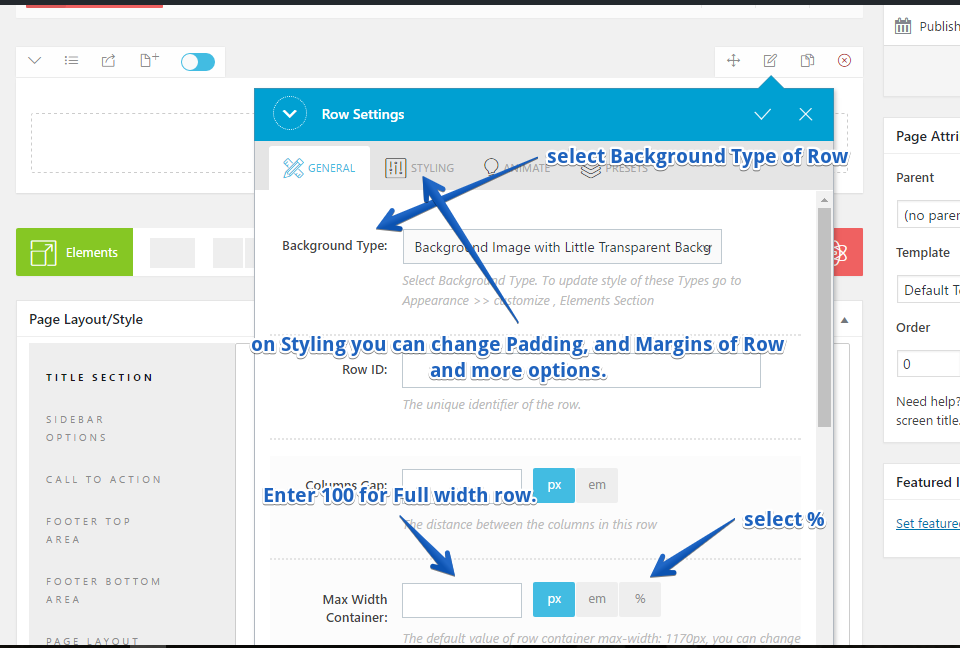
Strecth Row Width 100%
To add other elements Please add new row, and add your element you want to include in that row. Everything well explain itself. Like screenshot below.

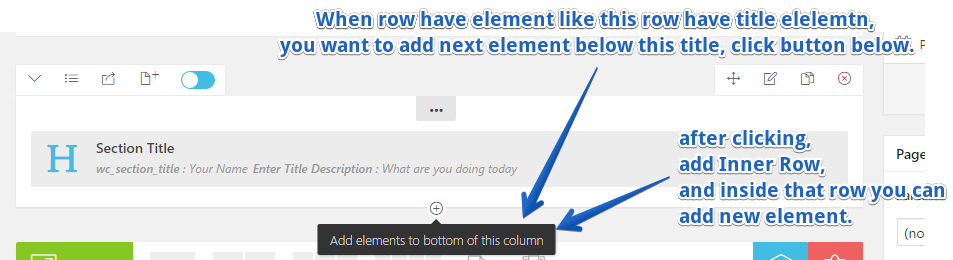
Row inside Row
So you added a row, and inserted a title element into it. Below Title you want to add 3 columns for pricing table. Just click on inner row. and follow these screens.
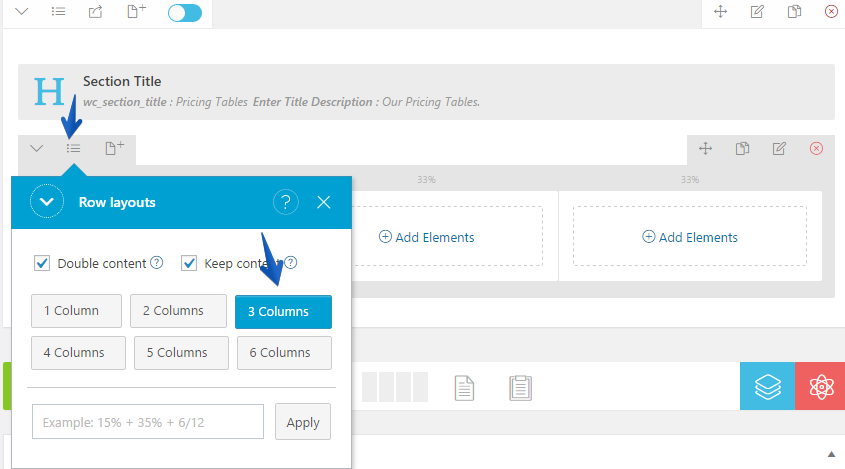
All Elements, Rows are defined in more details in later sections of this documentation.
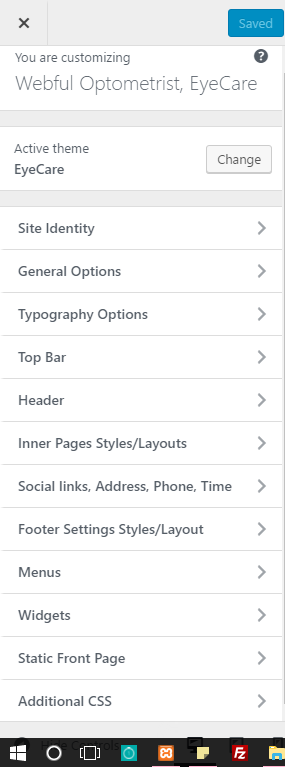
Customization Options
Go to apperance >> customize from admin panel, you will see following options there.
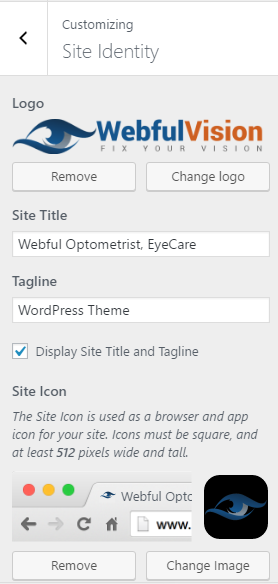
Site Identity
This is where you can set Site name, Logo and FavIcon
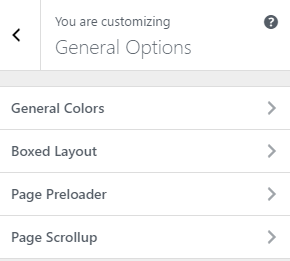
General Options
Here you can set site for boxed layout, Its background color and image.
Here you can also set preloader background color, and animation color as well. Also you can disbale preloader.
Here you can also Disable, Site scroller
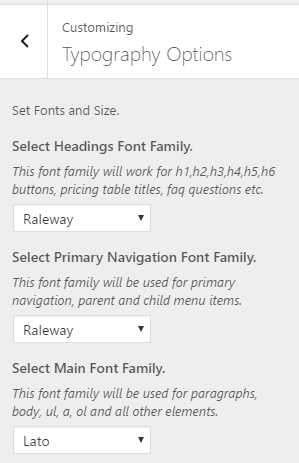
Typography Options
Here you can select Typography google fonts for Headings, Navigation and Main font family.
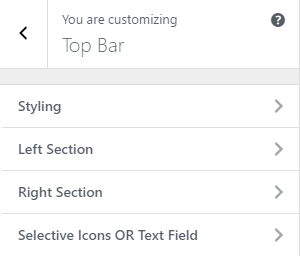
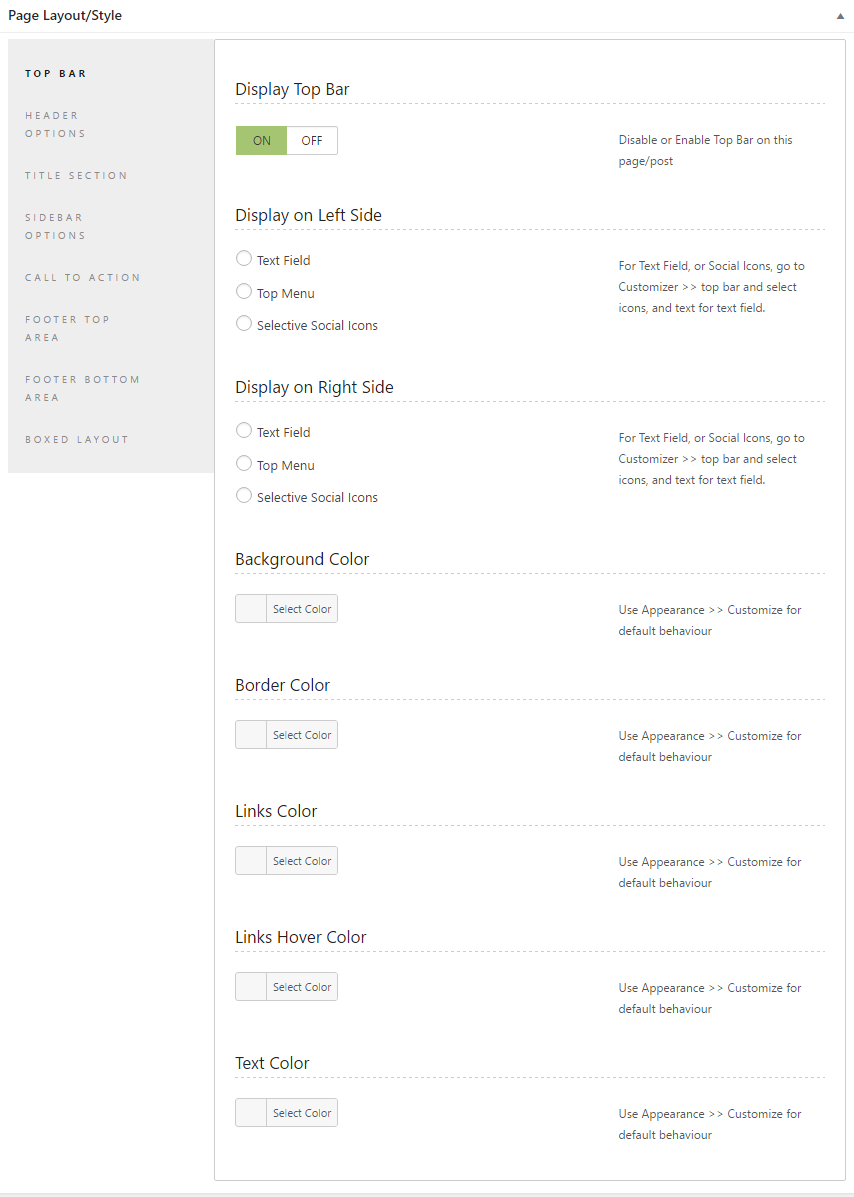
Top Bar Options
Styling gives you ability to change background, text color, and links colors.
Left section you can select, Menu, Social icons, or Text fields to display.
Same 3 options as left have.
Header bar logo Options
This section gives you ability to change colors, of header background, links, navigation background, links color much more. For logo please go to site identity in customize options.

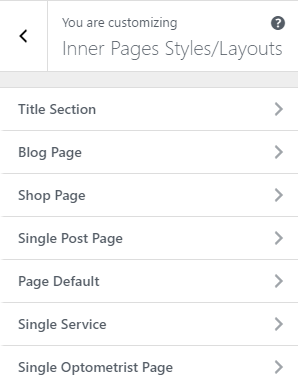
Inner Pages Styles and layouts Options
Title Section: You can disable, Change background image, and colors.
Blog Page: Select Sidebar Position, Disable meta info, disable read more link, content display, excerpt or content, excerpt length,
Single Post Page: Select Sidebar Position, Disable meta, Disable tags, Disable social sharing, Disable author box, Disable comments.
Default Page: Select Sidebar Position.
Single Service Page: Select Sidebar Position.
Single Doctor Page: Almot all options are setable here.
Shop Page: Select Sidebar Position, Products per row, products per page.
Social links and address Options
Setup social links, and address for headr top and other sections of site like footer widget.

Footer Settings Options
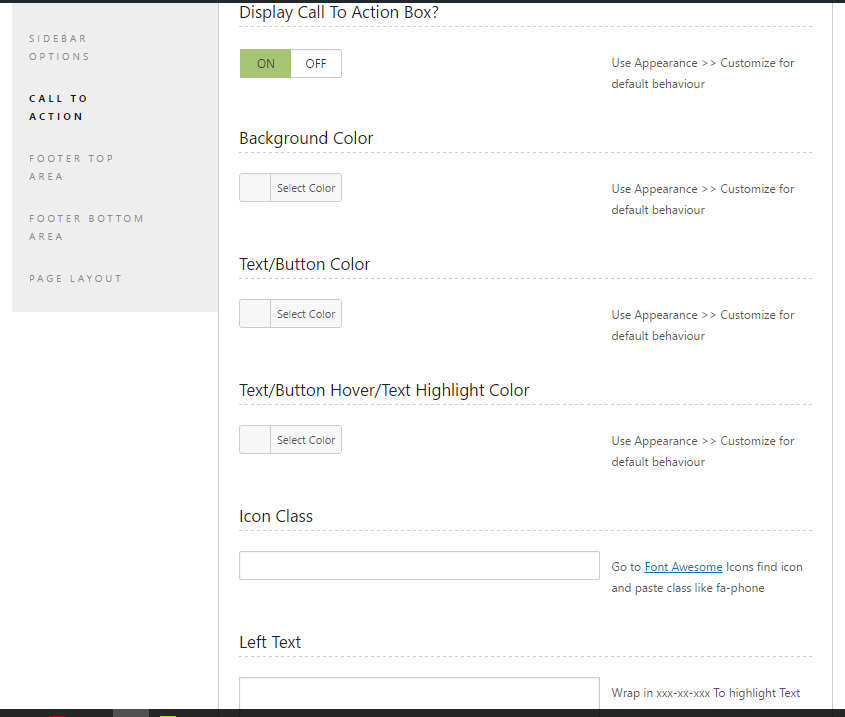
Call to action Select background, icon, text, button link, button text, button color etc.
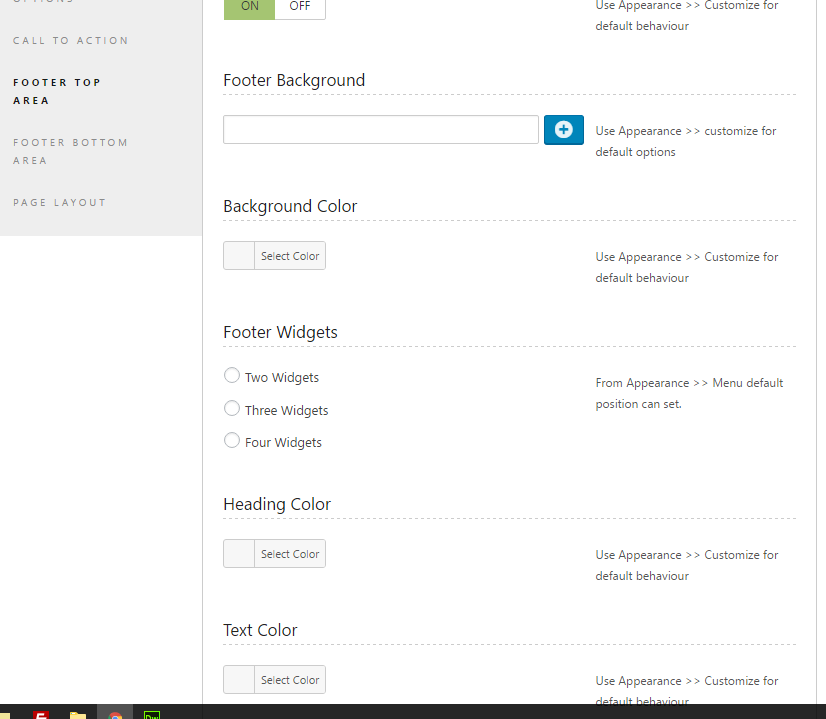
Footer top Widget areas 2, 3, 4. Background image, background color, headings color, link color, hover color text color and more.
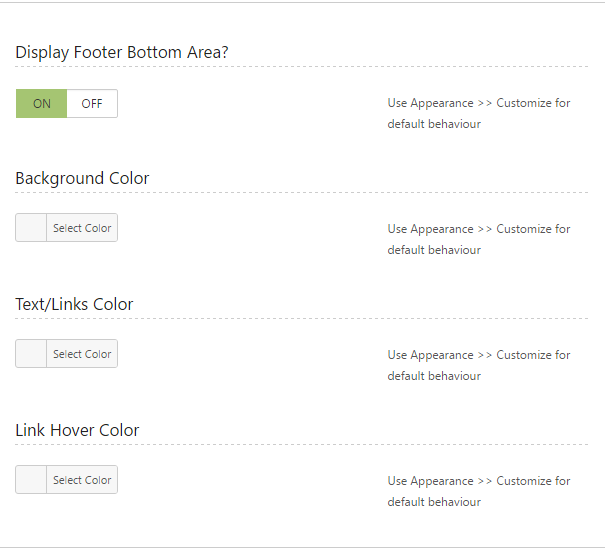
Footer Bottom Copyright information, disable or enable, left side content, right side content to display.

Customization By Single Post, Page, Service, Veterinary or product.
This theme have Page, layout or styling settings on every single service, page, post, veterinary and products. On post editor scroll down to see the page layout options.
Title Section
Title Section For the post you are editing you can set title settings which will work only for that post/page service, or doctor to set global settings please go to Apperance >> Customizer
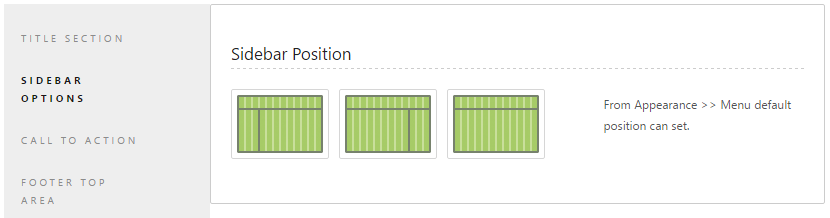
Sidebar Options
Select sidebar position for the post you are editing, for global settings go to Appearance >> Customize
Call To Action
This area gives you ability to set unique call to actions for specefic page/post, service, veterinary, product. For global settings go to Apperance >> customize.
Footer top
Styling footer top area, Define how many widgets to use for Global settings go to Appearance >> Customize
Footer Bottom
Footer bottom styling, colors etc. global settings please go to Apperance >> Customizer
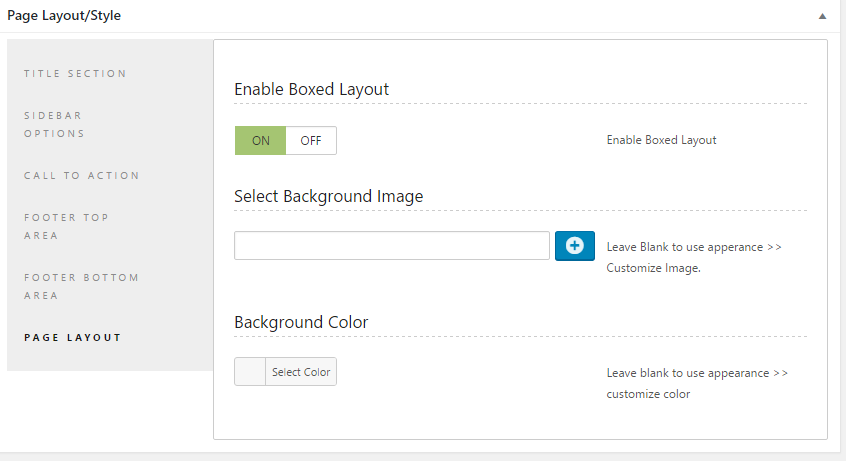
Page Layout / Boxed
Boxed layout and background for boxed layout. global settings please go to Apperance >> Customizer
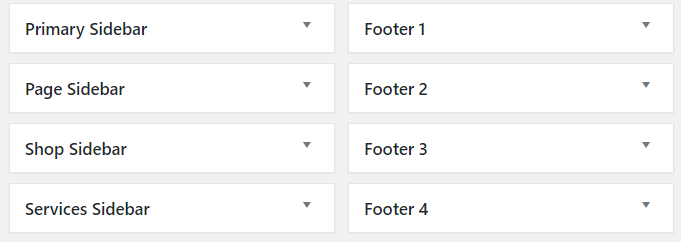
Sidebars and Widgets
Sidebars Theme includes, Primary sidebar, Page sidebar, Services Sidebar, Footer 1, footer 2, footer 3, footer 4, If in Appearance >> customize >> Footer top, less than 4 widgets selected footer sidebars will disapear. And shop sidebar.
As each sidebar Explain itself with its name you can have better idea by looking this screenshot.
Builtin Widgets We have also included following two widgets to make it easy to add them to footer or anywhere else.

Navigation and Menus
Go to apperance >> Menu, Write your menu name, Create menu add menu items you want to display then select theme location from bottom.

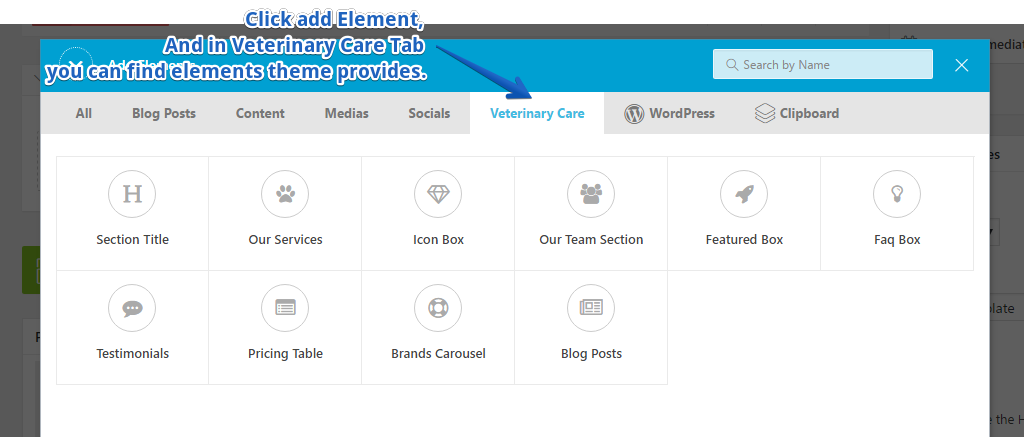
Using Page Builder or Elements
There are many elements every element have hints in it to use, Veterinary Care tab include all elements this theme added. Using rows and some elements detail is below.


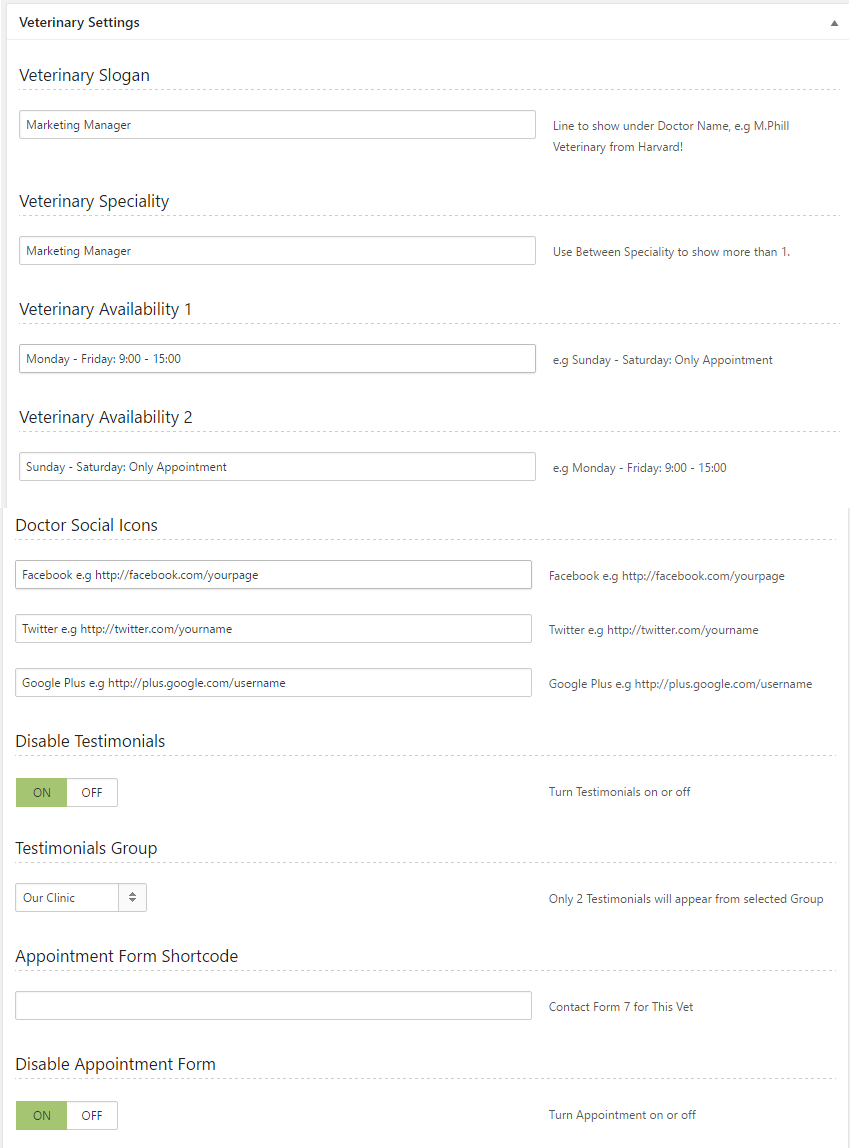
Optometrist Post Type
Optometrist have some special features, like speciality, testimonial group, Indvidual veterinary contact form, social links, and more options. Please use shortcode below to create Progress bar in Doctor page if you are not using page elements. with page builder.
Available Shortcodes
[wc_progressbar wc_progress_label="Cosmetic" wc_pgoress_type="primary" wc_progress_percentage="85"]
In above shortcode, Label is what is heading of progress bar
type actually change color, available types: primary, secondary, alert, warning, success
Percentage: is how much progress bar is covered.
Options for Single Vet
Other Post Types
Posts, Pages are wordpress default types.
Contact
Here you can create contacct forms and use their shortcode to embed them into post/page or anywhere they are reauired.
Services
You can create services groups, and single service, they have page layout options as well. You can view them as well.
Testimonials
Do not have preview for single , but you can emebed them to pages by scroll or grid.
Products
This is where you can add the products to sell.
Revolution Slider
Please find its documentation here: https://www.themepunch.com/revslider-doc/slider-revolution-documentation/
To add slider on a page top, Disable title section on that page, add a row with Visual composer set its width 100% from styling of row, then add element go to Wordpress and select Slider there. For details check home page section. and Element page builder section.
Source and Credits
We would like to thank you to following sources without them this product was not possible.
- Wordpress
- JQuery
- Owl Carousel
- King Composer
- WooCommerce
- Font Awesome
Once again thank you for buying this product for any questions or help kindly comment on product page.